Saturday, January 24, 2015

exciting news.

Hi everybody! I know I've been away from the blogging world for quite some time, but I have some exciting news to share. I recently began going to school to get my nail technician license, and I have already found a job at an awesome local salon. I've decided to bring my blog back from the dead in an effort to continue to grow in the industry. I have been posting my nail work on my Instagram (@c4rped1em) but I wanted to return to the blog so I would have an outlet that was exclusively nails-only. I am committed to doing my best to keep this blog up & running with various nail looks, things I'm working on in school, and anything else that might pertain to this exciting little world that I have been in love with for so long! 


I am so grateful that I am going to be able to make something I am so passionate about my daily career. Having a career is so different from working, and I have been merely "working" for far too long. It's time to put myself first and allow myself to do something I have wanted to do for so long. For those of you that know me personally, my overall plan is to continue in school to obtain my Masters of Arts in Teaching so I will be able to simultaneously teach elementary school while I pursue a career in nail artistry. I am so excited for these new chapters in my life. 


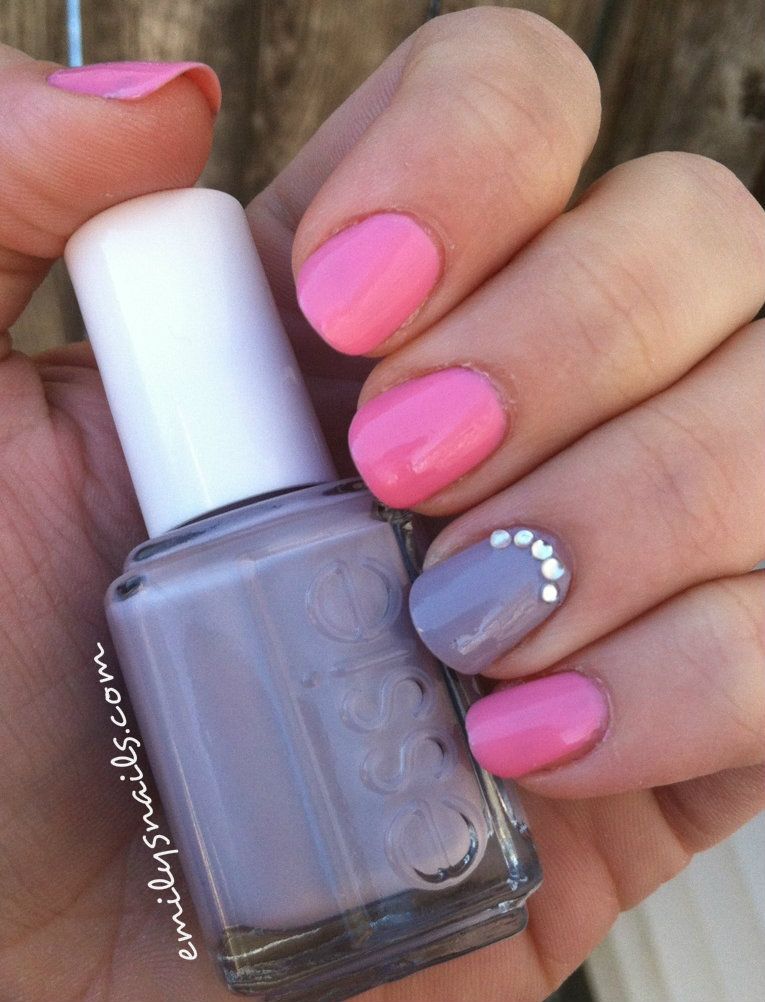
I'd like to show you my first attempts at nail tips & wraps, two services that I previously had no knowledge of performing. I will admit that I did get quite frustrated when I first attempted tips. Adhering tips on to your own nails is hard, or at least was at first. All things considered, I was pretty content with how mine came out: 


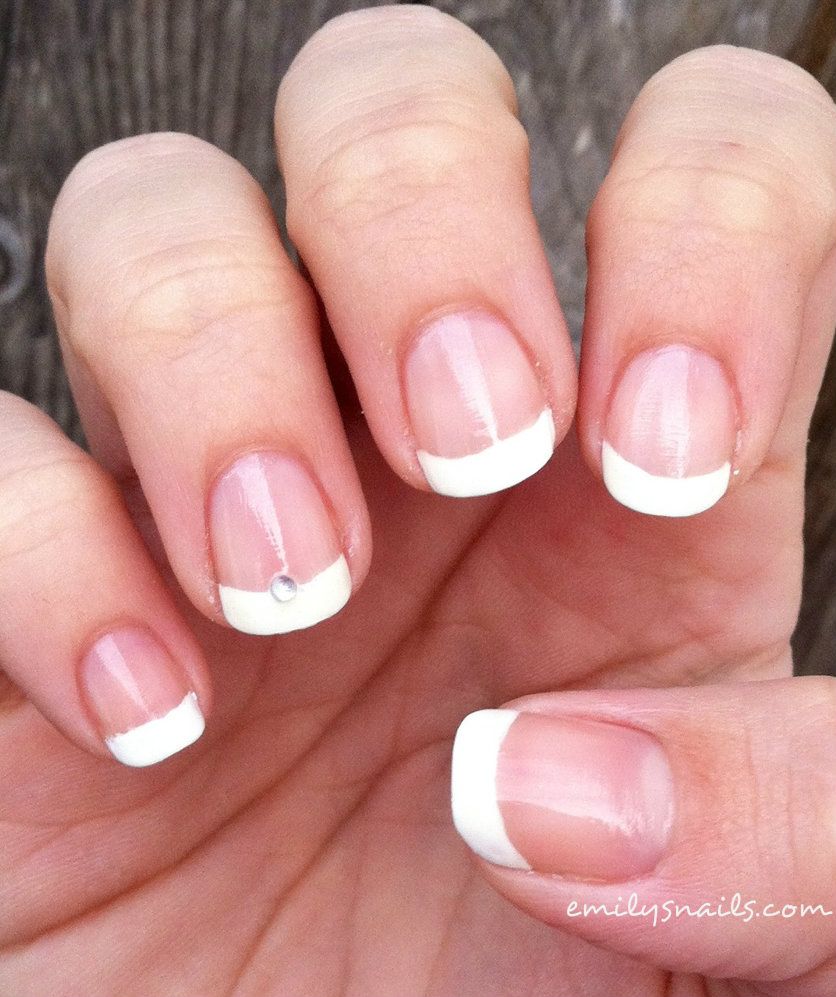
I couldn't believe how (relatively) natural the tips looked on my nails. The next day, we worked with OPI MicroWrap. I was intent on putting a wrap on each of my nails. The more practice the better, right?


I was really feeling these. I planned on painting them when I got home, but things got super busy & I was unable to find the time to do so. I eventually hated how they felt on, and ended up soaking them in acetone. Now I'm rocking really short natural nails. I regret putting tips on all of my nails, but we're back on the road to strengthening my natural nails so all is good.

Please take a look through my blog and keep an eye out for new posts. I'm excited to be back in the wonderful blogging community. I hope everybody enjoys the rest of their weekend.

Sunday, November 24, 2013

french manicure gradient

HELLO all! Earlier today, I had a random strong urge to blog. It's been months and months since I last posted, so I hope that you all haven't forgotten about me. It's been a busy year, probably my busiest yet, but it's indeed been a great one. I've still been painting my nails regularly and posting them on Instagram (@c4rped1em; I'm obsessed), but I just haven't had that extra bit of time to post them on here. In order to get back into the swing of things, I'm going to back-post and post all of the manicures I've done over the past few months. I'll also post some new ones, of course.

I'm excited to check out all of your blogs and see how everyone is doing! As for today's post, I'll be showing you a manicure I did last week that I absolutely loved.

It's called a French manicure gradient, and I got the idea from Sarah at Chalkboard Nails. I've been wanting to try this for a while, but for some reason I thought it would be really difficult. Of course it turned out to be pretty easy! It's just a simple gradient. Take a look:


For this manicure, I used my favorite white, OPI Alpine Snow. The pink is Essie Better Together, another favorite of mine. I debated which pink/nude to use for a good ten minutes, but I ended up choosing this gorgeous Essie and I'm glad I did. 

How can you get this look? Easy! First, paint on two or three coats of your sheer pink or nude. I used three coats. Then, paint on one coat of your fast-dry top coat of choice. For me, it's Poshé, which is GREAT if you haven't tried it. (Think Seche Vite but even better: you can use up pretty much the entire bottle without the lacquer getting thick and goopy! It also makes my polish last substantially longer than most other base coats.) Next, grab a triangular makeup sponge (one of these) and a piece of paper or aluminum foil to act as a surface to put the polish on. Swipe on some white next to your choice of a pink or nude polish, about as thick as your nail or so. Push the makeup sponge on top of the polish, then carefully sponge the polish on to your nail, one by one. How much white you choose to use is up to you, and depends on how long your nails are. I did each nail twice to make the white stand out more. Once the polish dries, swipe on another coat of top coat and clean around your edges if necessary. 

Have you tried this look before? I think it's an awesome take on a classic and always chic look.

If you're looking for some new polish, check out my blog sale

Sunday, January 27, 2013

the first day of the rest of my life.

Well hello there! It's officially almost my first day of student teaching. I'm so nervous, but excited at the same time. After reading over the syllabus for the practicum course I'm about to begin, I've realized I probably won't have much free time this semester. Painting my nails is a relaxation technique so that will probably still happen from time to time, but actually getting regular posts up here probably won't happen, so I'm bracing myself for a mini-hiatus (or, at least much less regular posting).

I'll also be updating the blog sale soon; I have a LOT of polish just sitting around that I need to get rid of. I need the money and I also need the space in my room. ;P

I'll be checking in on here from time to time, because there's no way I could completely go without blogging. I'm just hoping my student teaching practicum goes smoother than I'm expecting.

Here's the last manicure I wore... that is what I'll leave you with!


The pink is Essie I Need A Vacation (yup.) and the purple is Essie Love & Acceptance. I am digging the rhinestones in this pattern. So cute! Simple styles are my fave.. and this is so simple and chic. 

I wish you all a happy Monday and a great week overall. Maybe I'll get a post up this week, maybe I wont! We shall see.

Monday, January 21, 2013

french mani monday

Hello! Ah Monday is almost over... today was actually not so bad of a day. Work flew by and I seemed to have a productive day. I have no complaints overall. For some reason, I struggle to produce blog posts when I'm home... not sure why, but I need to overcome that! I've been doing my nails regularly, I just have no motivation to blog.

Yesterday I needed a palate cleanser, so I went with a French manicure. I loooove French manicures- I really should do them more often. It just annoyed me how fast they chipped. I was doing a lot of work with my hands today, so it's my own doing, but still very annoying. Here they are:


I freehanded the French tips, which I'm pretty darn proud of. I have no artistic ability whatsoever but these could probably fool you into thinking I do. ;D This is OPI Alpine Snow on the tips and a coat of the soft Essie Cloud Nine. I then topped it with a new top coat of mine, Cult Nails Wicked Fast. It really did dry really fast, and I noticed that it seems to be much thinner than my faithful Seche. 

What do you think?

Thursday, January 17, 2013

liquid sands: the impossible

Today I'm going to show you all one of the new OPI Liquid Sand polishes. I picked up The Impossible and one other, and I'm going to show you The Impossible today. I'm not entirely crazy about the finish of these polishes, but being the collector I am, I had to get a few of them for my collection. They stand out because they're so different, but the bumpy finish just makes me feel like my manicure is only half done.

Here is two coats of The Impossible:


The good part about these polishes is that, like other OPI, they dry really fast. This polish has a bunch of glitter stars in it which I had such a hard time getting out- I was only able to get one on my nails! I'd love to try and see what this polish looks like with a top coat, but that sort of ruins the whole "Liquid Sand" aspect of it.